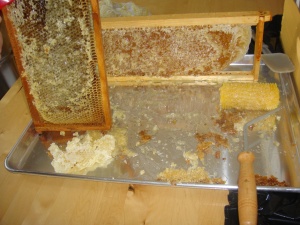
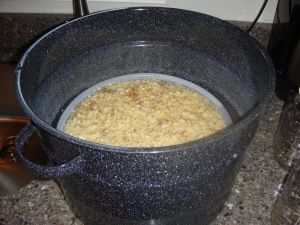
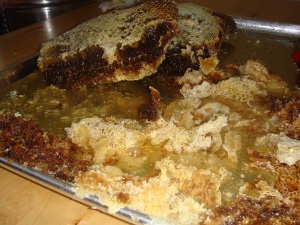
Once the supers were inside, the messy part began: uncapping. Oh my goodness what a mess but at least it was contained, I happened to have a very large cookie sheet that served as the “honey catcher” fairly well: we uncapped the frames while resting the frames on the sheet, any honey that ran out was collected on the tray and later scraped into the strainer. My husband was excellent at that, he wanted every bit of honey we could get! We did 2 sessions of harvesting and the picture below is from the second one. Remember, all pictures can be enlarged by clicking on them.

You can see how some comb was EXTREMELY thick. Some of it had been drawn out twice! Meaning the bees had drawn, filled and capped honey, then drawn, filled and capped AGAIN over the capped honey. Bizarre.


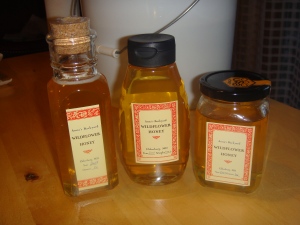
The jar on the right is known as a victorian square and it’s my favorite. But it’s very pricey as I can only get it online and the shipping costs double the price of the jars. The muth jar (with the cork) is extremely attractive as it has an embossed skep on the back and also “One Pound of Honey” embossed in the glass. The middle jar is one that I bought for home at the request of my husband. He wanted an easy squeeze plastic bottle for using on biscuits, etc. I made bread yesterday using this bottle and I have to say it was extremely easy to just squeeze it out, rather than pouring it from a spout that would get sticky as a result. The lid is a dripless lid and you store the bottle on the lid with no leaks! But I’m not a fan of storing items in plastic, so we’ll see if I use these again.
You can see I’ve added a shrink band to the muth jar: the cork makes me nervous when customers pick up their honey, I always worry the cork is going to come out. So I started using the shrink bands to ease my mind rather than as a “no tamper” indicator, though that doesn’t hurt.
The victorian square is sporting a tamper-evident seal from Brushy Mountain which I love. It says “USA Honey” on it, and I like that my customers know their honey has been untouched after bottling. I have a beekeeper friend who told me a woman came up to his honey stand, opened the bottle and stuck her finger in it!!!! Needless to say, she had to buy that bottle. Crazy people.
The plastic jar has a seal inside the lid that fastens itself to the jar when the lid is screwed on.
I’m seriously considering going with a regular queenline glass jar (shape is the same as the middle jar) and just buying black lids. Queenlines are the ones most beekeepers here use. But what I like about my honey is the packaging: it’s like nothing you normally see for sale at fairs and festivals. I think I’m going to take this winter and design my own labels too, ones that I can print at home. The labels in the picture are from myownlabels.com also known as evermine.com. What I especially like about these labels is that they are waterproof vinyl, so if someone puts their crystallized honey jar in a pan of hot water to liquify it, the label remains intact. It is also repositionable, and that is an appreciated feature.
So much to think about this winter, jars, labels, and making my own soap. Next time: my homemade solar wax melter!

Excellent! Thank you for a wonderful account of your harvesting! So much to think about…
I have five frames waiting to be extracted and at least that many in the hive I need to gently “confiscate” so your photos and description were timely!
That’s very exciting Martha! Planning ahead makes for easier clean-up/less mess, good luck.
Gorgeous jars. What price do you sell your honey for?
Thank you Emily, I love the look too. I sell the jars with the black lids for $10 a pound, and the muth jars are $12. We have a festival coming up soon and I plan to bottle the rest in regular queenlines with white lids. Over the winter I hope to acquire a particular queenline style for which I can purchase black lids. I love the black lids and that’s what drives the bottle style. I will have a future post detailing the pricing on the items and what a quandary it can be to pick out labels and jars.